
Making Maple Syrup
Posted by Scott Veriha on Mar 25th 2020
Maple season came two weeks early this year. I normally tap around the 20th of March, but this year I put my first tap in on the 3rd of March, and should have started a day or two before that. I was caught off guard, and have been scrambling to catch up. I currently have 80 taps in place, and have been collecting 20 to 45 gallons a day. It is adding up quick. I still need to get the cooker set up, and it is looking to be a nice, and long, season. Long range temp forecasts are looking good! Maple sap flows best when the days are above 40 degrees, there is little to no wind, and the sun is shining, with the nights getting below freezing.
I started making syrup in 2010, my first
taps were fashioned from copper pipe, a nail, a piece of parachute cord, and a
milk jug.
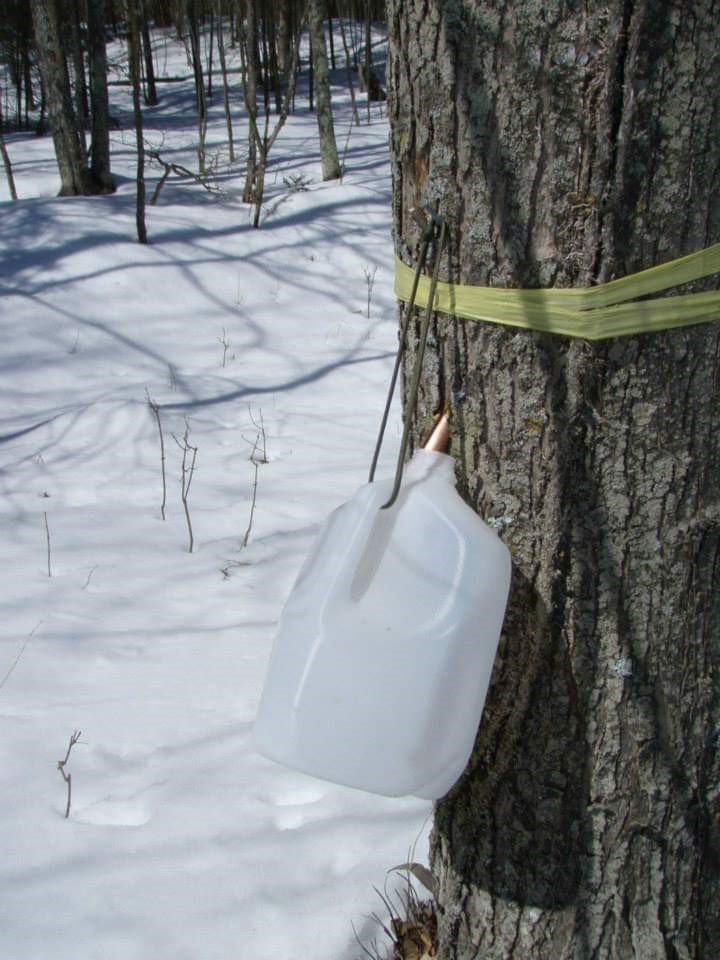
Picture Above: My first maple taps
My taps worked well, but the hole I needed to drill was really too big for long term tree health. That first year I collected about 160 gallons of sap, from 15 taps, and made 3 gallons of syrup. I was hooked!
Today I still use milk jugs, and parachute cord, for my sap collection, but I have purchased commercially available taps, and plastic tubing for my collection needs. I use a short piece of tubing, about 6 inches long, that directs the sap into the jug, and helps to keep the empty jug stabilized if it is windy. Instead of a nail the tap now holds the parachute cord and milk jug. The milk jugs are simple and easy to use, at the end of the year instead of having to wash out a mess of buckets, I just take them to the recycling center. Milk jugs also do a pretty good job of keeping out rain and snow. A couple of my friends save them for me thru out the year, and in exchange I give them a jar, or two, of syrup. The only down side to the milk jugs is that on one of those perfect days, for sap flow, I have to collect twice in the same day to keep them from over flowing. My use of milk jugs was inspired from reading the book, “Backyard Sugaring”, by Rink Mann. I highly recommend that book for anyone wishing to start up, and make a few gallons of syrup.
I started out small, but every year I have
increased the size of my operation and the number of taps. I also keep
improving my efficiency, while making it easier physically. My first two years
I pulled a sled thru the woods to collect my sap,then I moved up to a small trailer, attached to my 4-wheeler, with
several six-gallon buckets.
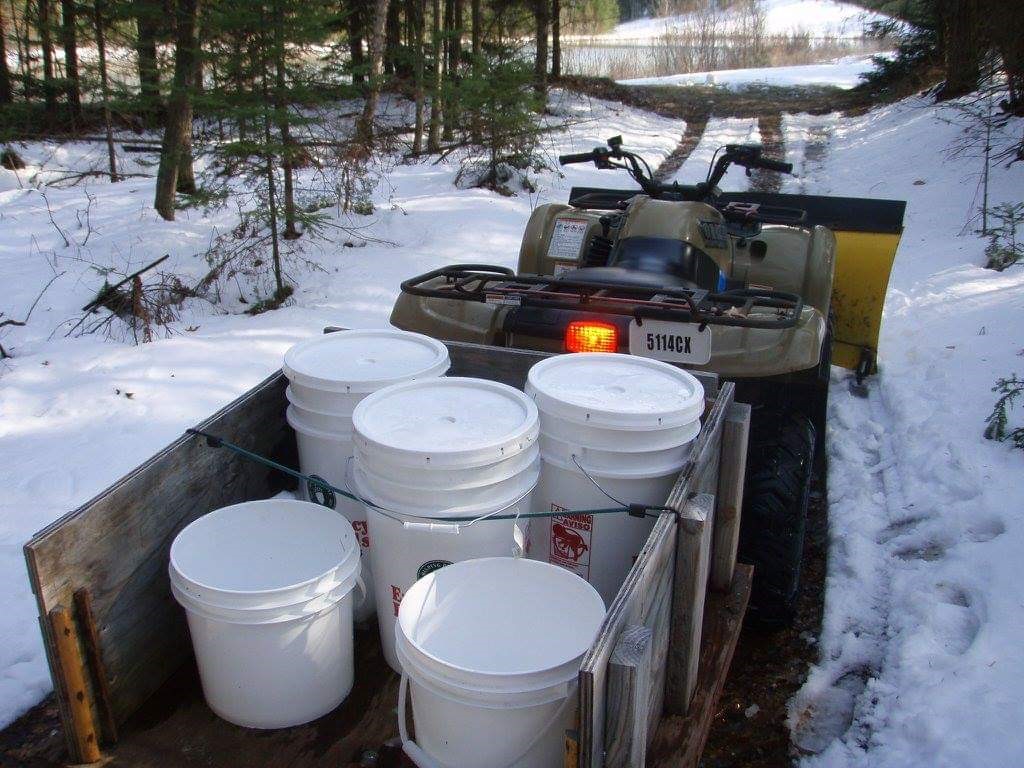
Picture Above: Collecting sap with six-gallon pails. Having to keep messing with the lids really slowed me down, but the lids were the only way to keep the sap from sloshing out of the buckets.
This year I decided to buy a dedicated sap tank, so I purchased a food grade,
35-gallon leg tank for my trailer.
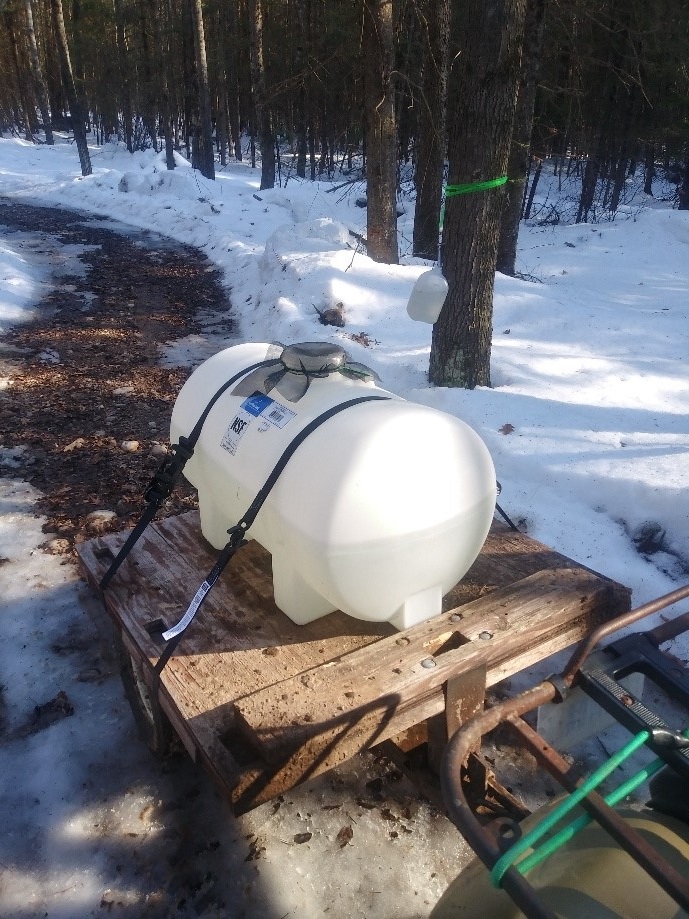
Pictured Above: Thirty-five-gallon leg tank, the screen over the opening is for filtering out tree debris that always seems to end up in the jugs.
It still takes me about two hours to do my collection, but in that
two hours I am visiting 80 taps instead of 15. Seeing how I cannot lift a
35-gallon tank to pour the sap into my storage barrels, I also purchased a
small RV/Motorhome water pump to move my sap. The pump is a 12v dc pump and is
wired into my 4wheeler to power it.

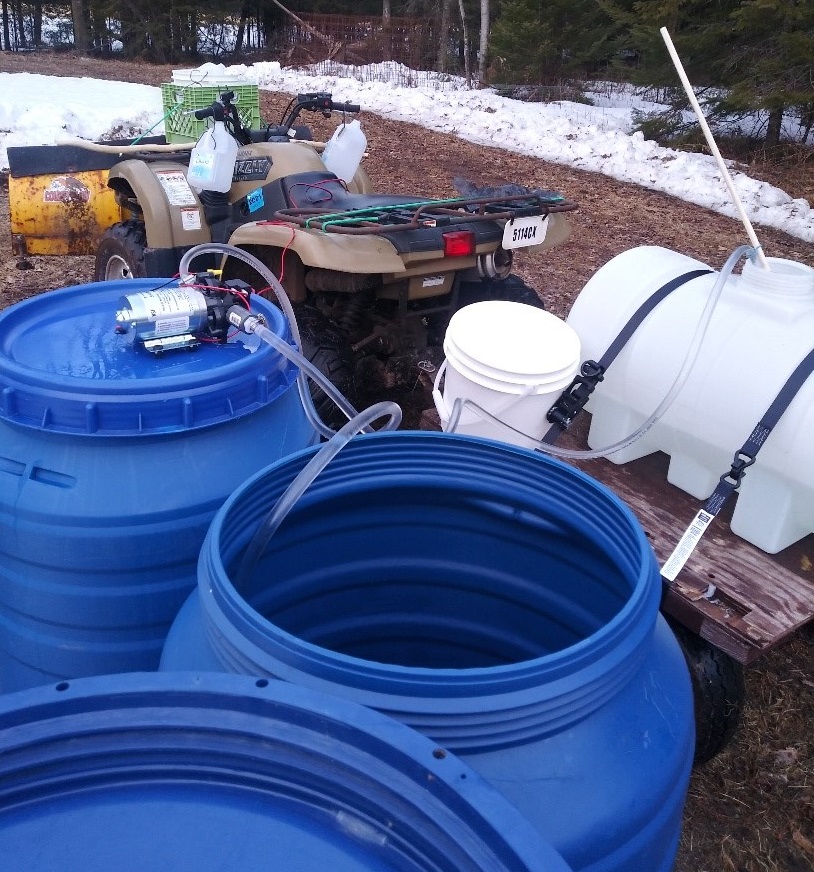
Pictured Above: 12vdc water pump, self-priming, and can pump six feet or better vertically.
This year’s collection has gone very well, all that is left is to set up my cooker, and start boiling.
My first year I used a 30qt stock pot, and
burner, for frying turkeys.
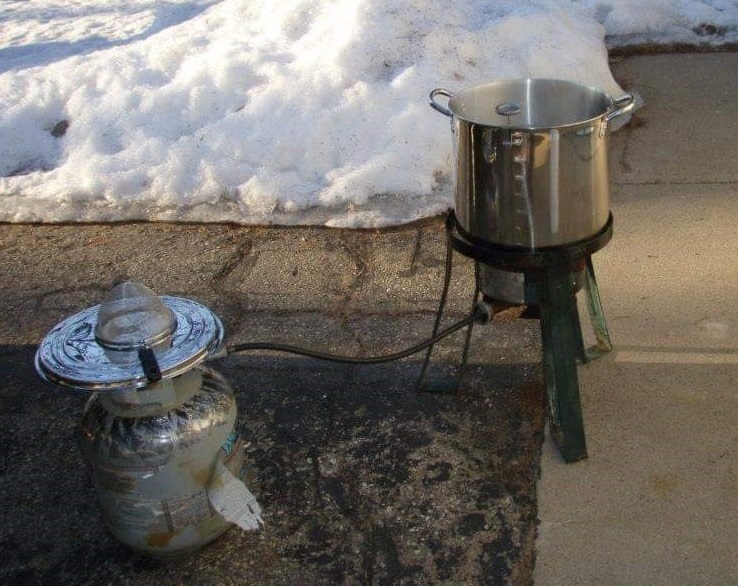
Pictured Above: A turkey fryer will work for making syrup, but it has limited surface area, so limited evaporation.
My preheater was my kitchen stove, but it still took a long time to boil off all that water. It can take anywhere from forty to eighty gallons of sap, depending on sugar content, to produce one gallon of syrup. I was preheating the sap before dumping it into the turkey fryer in order to keep the boiling going continuously without having to wait for it to restart after I had added cold sap. My second year I took an introductory welding class, and during the course of the class I welded up a 20x25 inch pan that sat on two burners, this greatly increased my evaporation rate, though I was still preheating on a separate burner.
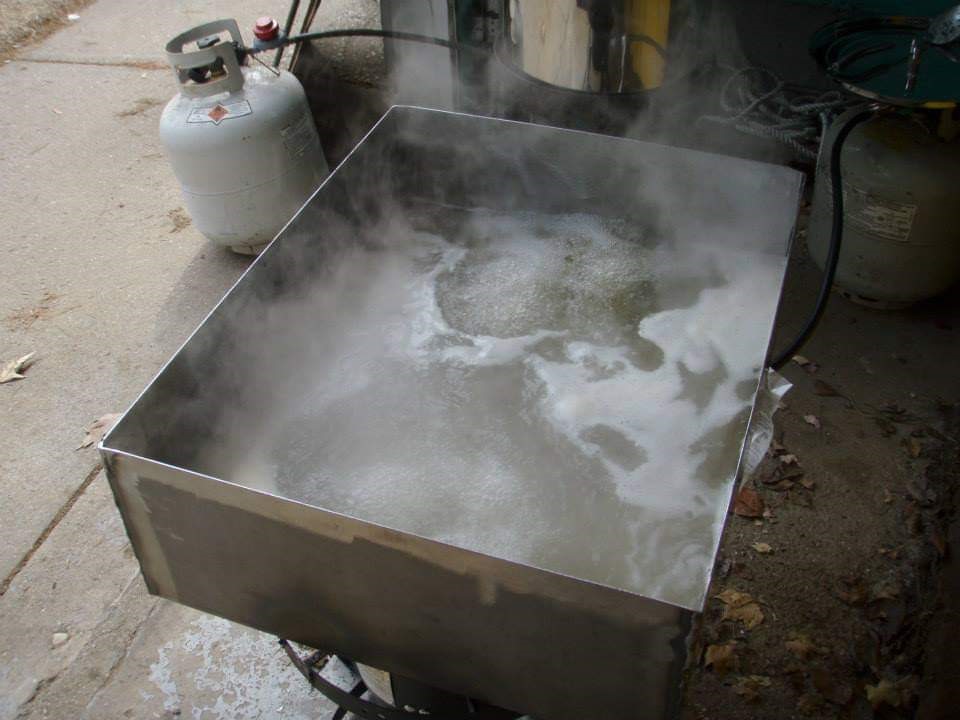
Picture Seven: A dedicated sap pan, larger surface area, much better evaporation.
Pictured Above: My Main Pan, 25x48 Inches, and a little over 10 gallons an hour of evaporation.
I have since welded up two more pans, my main pan is 25x48 inches, and my preheater pan is 14x27 inches. I have used the main pan, but, this is the first year that I will be using the preheater pan. I am hoping that it helps get my evaporation rate from 10 gallons an hour up to 12 to 14 gallons per hour.
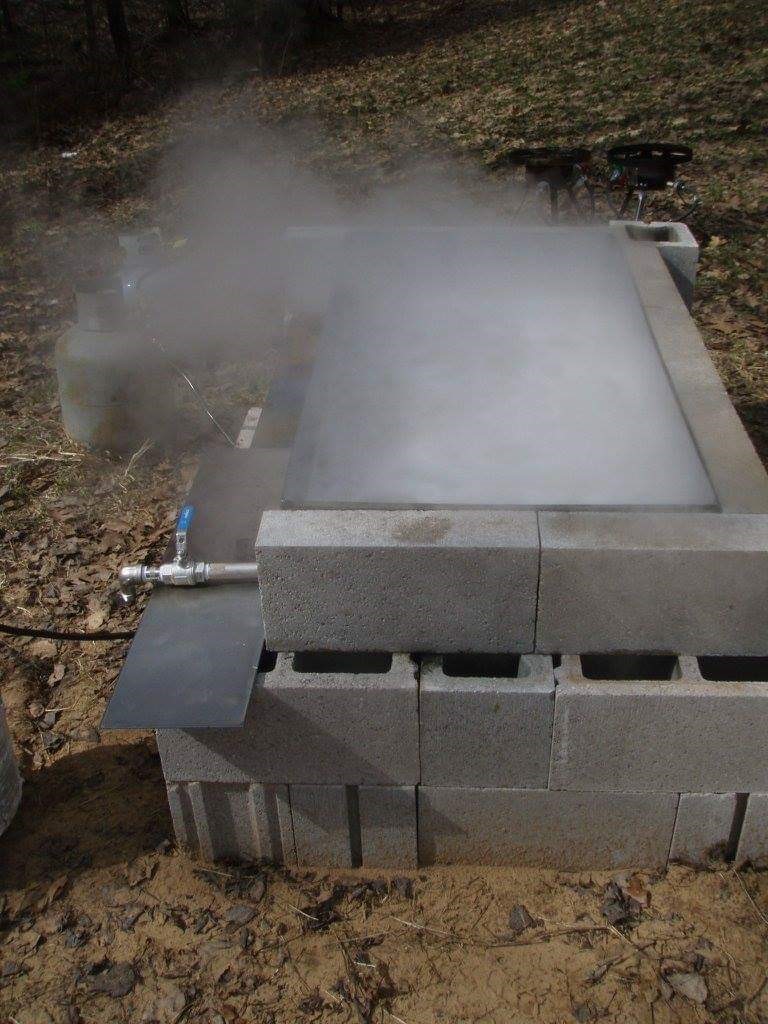
My boiling rig for this year.

Pictured Above: Completed boiling rig, filling the pans for initial light off.
I have added in all the
changes that I dreamed up over the last few years. I’m using a 55 Gallon barrel,
head tank, to gravity feed sap into the preheater pan, the sap then gravity
feeds into the main pan. My little pump pumps the sap from the storage barrels
to the head tank and the process goes as fast as the evaporation rate. My
preheater pan is hitting 135 degrees with sap trickling thru it, over all I am
very happy with this setup. Rolling Steam!
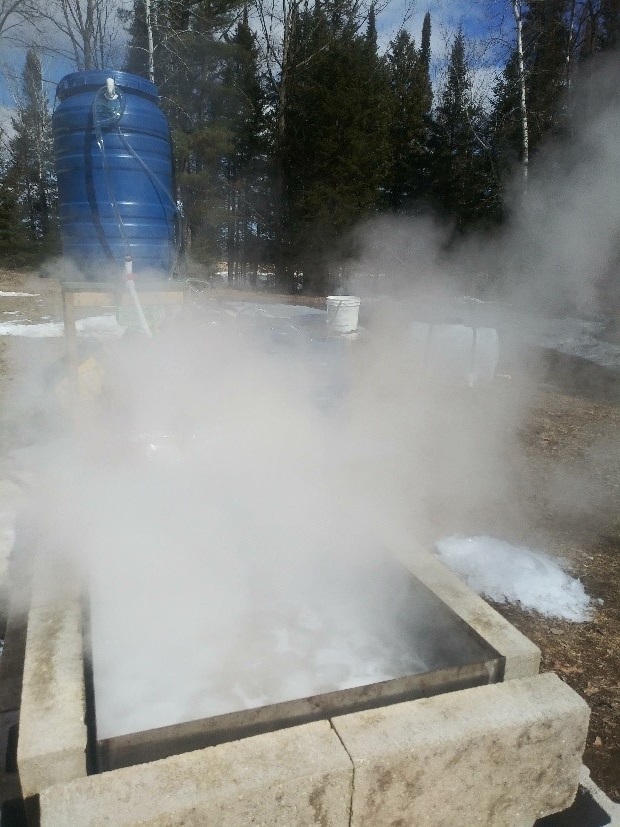
Picture Above: Making Syrup!
I hope that you are starting to see that with a little ingenuity and tinkering you too can make maple syrup with a minimal investment into equipment. Making a few gallons of tasty syrup for you and your family does not have to be an expensive endeavor. Maple syrup season does not conflict with any other outdoor activity, and it is good to get off the couch, and into the spring woods. It gets you in shape for the coming summer activities, and it is really nice to watch the days get warmer, the snow melt, and the animals coming out of their winter hideouts.
Peace, Scott

About the
Author: Scott Veriha is a retired Navy Submariner, beekeeper, gardener,
orchardist, and student of nature. Scott completed a degree in Environmental
Science, in 2014, from the University of Wisconsin Green Bay. Scott is the
owner and operator of Sweet Spot Apiary, Sugar Bush, and Truck Farm.
